> ## Documentation Index
> Fetch the complete documentation index at: https://knowledge.goautonomous.io/llms.txt
> Use this file to discover all available pages before exploring further.
# Create and configure a workflow
> Build a workflow step by step using the visual drag-and-drop editor in Pulse.
## Overview
Building a workflow in Pulse is a visual process. You drag nodes onto a canvas, connect them, configure each node's behavior, and test the result — all without writing code.
## Create a new workflow
Navigate to Pulse from the app switcher (the grid icon in the top-right corner).
Click the **Create new workflow** button in the top-right corner. A new workflow opens in the editor with an empty canvas.
Enter a descriptive name for your workflow (e.g., "Price Checker," "Order Router"). The name appears in the Pulse dashboard and helps your team identify what the workflow does.
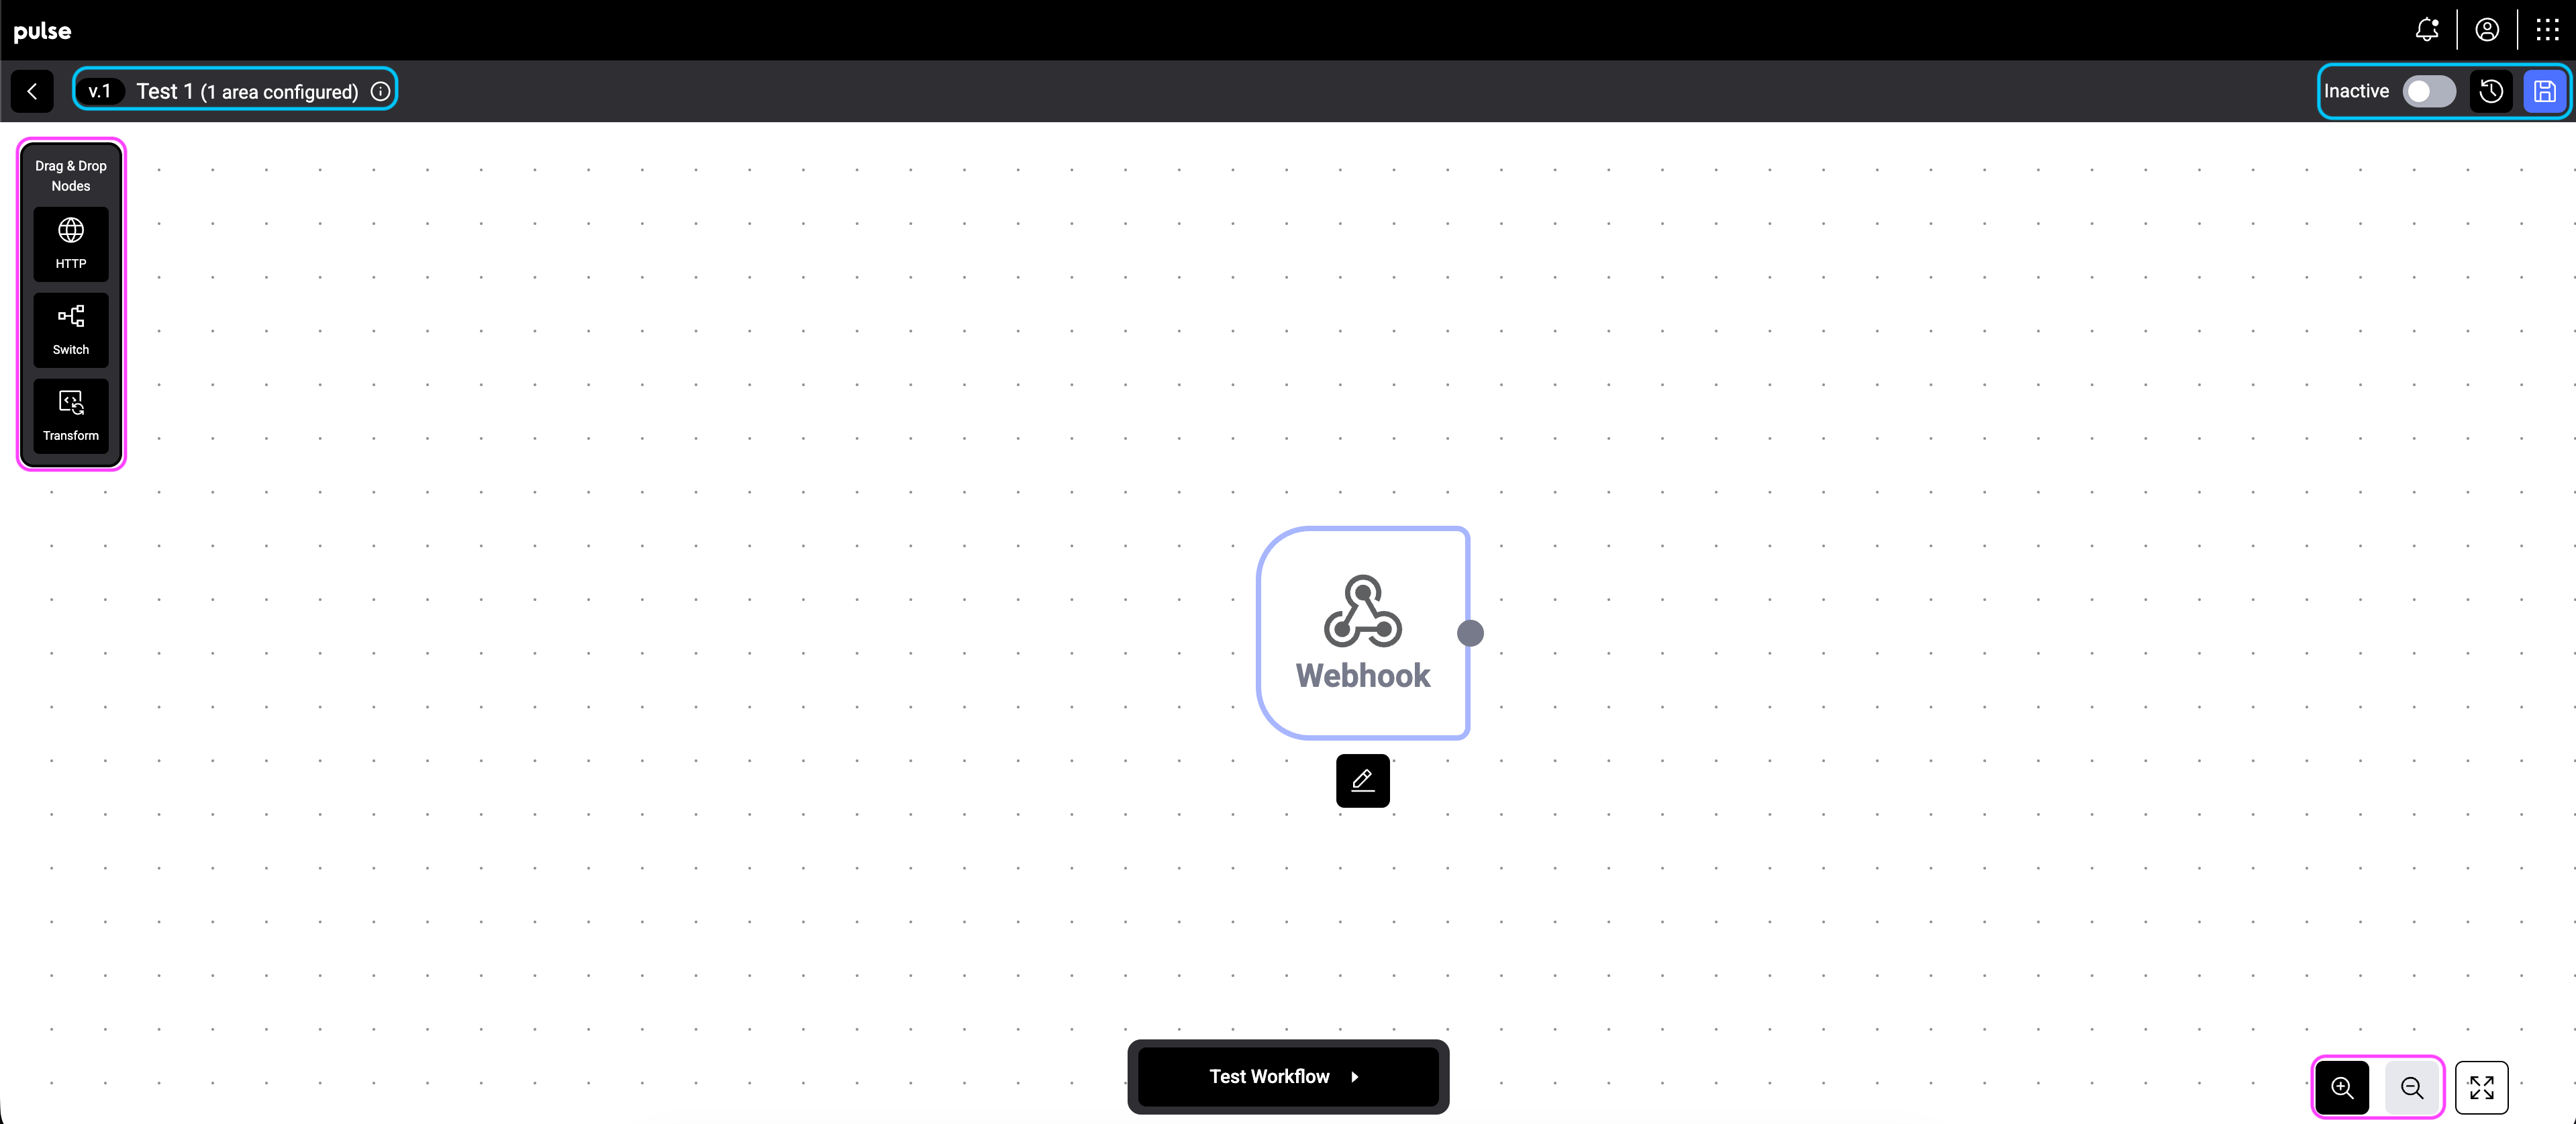
## The workflow editor
The editor consists of three main areas:
* **Node palette** (left sidebar) — a list of available node types you can drag onto the canvas: HTTP, Switch, and Transform.
* **Canvas** (center) — the visual workspace where you build your workflow by placing and connecting nodes.
* **Top bar** — shows the workflow name, version number, area configuration, and the Active/Inactive toggle.
 ### Zoom and navigation
Use the zoom controls in the bottom-right corner to zoom in, zoom out, or fit the entire workflow to screen. Click and drag on empty canvas space to pan around large workflows.
### Select multiple nodes
You can work with several nodes at once:
* **Shift-drag** on empty canvas space to draw a selection box around the nodes you want.
* **Shift-click** individual nodes to add them to (or remove them from) the current selection.
When more than one node is selected, a floating toolbar appears above the selection with quick actions: **Duplicate**, **Delete**, and **Save as component** (see [Custom components](#custom-components)).
### Copy and paste nodes
Use standard keyboard shortcuts to duplicate parts of a workflow — even between two different workflows open in separate browser tabs:
* **Cmd/Ctrl + C** — copy the currently selected nodes (and the edges between them) to the clipboard.
* **Cmd/Ctrl + V** — paste them at the cursor position. Pasted nodes get new IDs and are added to the current workflow.
Webhook nodes can't be copied — every workflow has exactly one webhook, and it's added automatically when you create a new workflow.
## Custom components
A **custom component** is a reusable group of nodes that you've saved to your tenant's library. Use components to share common patterns — like an "enrich + validate + route" sub-flow — across many workflows without rebuilding them by hand.
### Save a selection as a component
Shift-drag or shift-click to select two or more connected nodes. The selection toolbar appears.
Give the component a clear name and pick an icon. If a component with the same name already exists, you're asked whether to overwrite it.
Open a workflow and click the **Custom Components** button (the stacked-boxes icon) in the node palette to expand the library. Drag a component onto the canvas to insert all of its nodes and connections.
From the Custom Components panel you can also **rename** or **delete** any component. Changes take effect for everyone in your tenant — existing workflows that already use a copy of the component aren't affected.
Components don't include webhook nodes. To turn a selection into a component, make sure the webhook isn't part of it.
## Add and connect nodes
Click and drag a node type (HTTP, Switch, or Transform) from the left palette onto the canvas.
Drag from the output port (the dot on the right side of a node) to the input port (the dot on the left side of another node) to create a connection.
Double-Click on a node to open its configuration panel. Set the node's parameters — these vary by node type (see below).
Continue adding and connecting nodes until your workflow is complete.
## Node types
### Webhook
The webhook node is the starting point of your workflow. It defines what triggers the workflow — for example, when a new request is received or when a specific intent is detected. Every workflow starts with a webhook.
### Switch
The switch node routes data along different paths based on conditions. You define rules — for example, "if the intent is Order, go to Path 1; if the intent is Quote, go to Path 2." Each output path is labeled so you can track the logic.
### Transform
The transform node modifies data as it passes through. Use it for calculations (e.g., price checks), data formatting, field mapping, or any processing step before data reaches its destination.
### HTTP
The HTTP node makes API calls to external systems. Use it to send data to your ERP, query a pricing service, or trigger actions in other tools. Configure the URL, method, headers, and payload.
## Test your workflow
Before activating a workflow, use the **Test Workflow** button at the bottom of the canvas. This sends sample data through the workflow and shows you the result at each node — so you can verify the logic works correctly before it handles real requests.
## Activate and manage
* **Active toggle** — use the toggle in the top bar to turn the workflow on or off. Active workflows process matching requests automatically.
* **Version history** — the version number (e.g., v.2) in the top bar shows the current version. The history icon lets you review previous versions.
* **Save** — click the save icon to persist your changes.
Workflows process requests that match their trigger conditions and area configuration. Make sure your area assignments are correct before activating a workflow.
## What's next
* [Learn about Pulse and workflow concepts](/knowledge-base/pulse/overview)
* [Configure areas for your workflows](/knowledge-base/administration/areas)
### Zoom and navigation
Use the zoom controls in the bottom-right corner to zoom in, zoom out, or fit the entire workflow to screen. Click and drag on empty canvas space to pan around large workflows.
### Select multiple nodes
You can work with several nodes at once:
* **Shift-drag** on empty canvas space to draw a selection box around the nodes you want.
* **Shift-click** individual nodes to add them to (or remove them from) the current selection.
When more than one node is selected, a floating toolbar appears above the selection with quick actions: **Duplicate**, **Delete**, and **Save as component** (see [Custom components](#custom-components)).
### Copy and paste nodes
Use standard keyboard shortcuts to duplicate parts of a workflow — even between two different workflows open in separate browser tabs:
* **Cmd/Ctrl + C** — copy the currently selected nodes (and the edges between them) to the clipboard.
* **Cmd/Ctrl + V** — paste them at the cursor position. Pasted nodes get new IDs and are added to the current workflow.
Webhook nodes can't be copied — every workflow has exactly one webhook, and it's added automatically when you create a new workflow.
## Custom components
A **custom component** is a reusable group of nodes that you've saved to your tenant's library. Use components to share common patterns — like an "enrich + validate + route" sub-flow — across many workflows without rebuilding them by hand.
### Save a selection as a component
Shift-drag or shift-click to select two or more connected nodes. The selection toolbar appears.
Give the component a clear name and pick an icon. If a component with the same name already exists, you're asked whether to overwrite it.
Open a workflow and click the **Custom Components** button (the stacked-boxes icon) in the node palette to expand the library. Drag a component onto the canvas to insert all of its nodes and connections.
From the Custom Components panel you can also **rename** or **delete** any component. Changes take effect for everyone in your tenant — existing workflows that already use a copy of the component aren't affected.
Components don't include webhook nodes. To turn a selection into a component, make sure the webhook isn't part of it.
## Add and connect nodes
Click and drag a node type (HTTP, Switch, or Transform) from the left palette onto the canvas.
Drag from the output port (the dot on the right side of a node) to the input port (the dot on the left side of another node) to create a connection.
Double-Click on a node to open its configuration panel. Set the node's parameters — these vary by node type (see below).
Continue adding and connecting nodes until your workflow is complete.
## Node types
### Webhook
The webhook node is the starting point of your workflow. It defines what triggers the workflow — for example, when a new request is received or when a specific intent is detected. Every workflow starts with a webhook.
### Switch
The switch node routes data along different paths based on conditions. You define rules — for example, "if the intent is Order, go to Path 1; if the intent is Quote, go to Path 2." Each output path is labeled so you can track the logic.
### Transform
The transform node modifies data as it passes through. Use it for calculations (e.g., price checks), data formatting, field mapping, or any processing step before data reaches its destination.
### HTTP
The HTTP node makes API calls to external systems. Use it to send data to your ERP, query a pricing service, or trigger actions in other tools. Configure the URL, method, headers, and payload.
## Test your workflow
Before activating a workflow, use the **Test Workflow** button at the bottom of the canvas. This sends sample data through the workflow and shows you the result at each node — so you can verify the logic works correctly before it handles real requests.
## Activate and manage
* **Active toggle** — use the toggle in the top bar to turn the workflow on or off. Active workflows process matching requests automatically.
* **Version history** — the version number (e.g., v.2) in the top bar shows the current version. The history icon lets you review previous versions.
* **Save** — click the save icon to persist your changes.
Workflows process requests that match their trigger conditions and area configuration. Make sure your area assignments are correct before activating a workflow.
## What's next
* [Learn about Pulse and workflow concepts](/knowledge-base/pulse/overview)
* [Configure areas for your workflows](/knowledge-base/administration/areas)