

Overview
The product cart is the central workspace in Flow. It displays every line item that Go Autonomous extracted from a customer request — product numbers, names, quantities, prices, units of measure, and more. You can edit any value, add new lines, remove incorrect ones, and reorder items before confirming.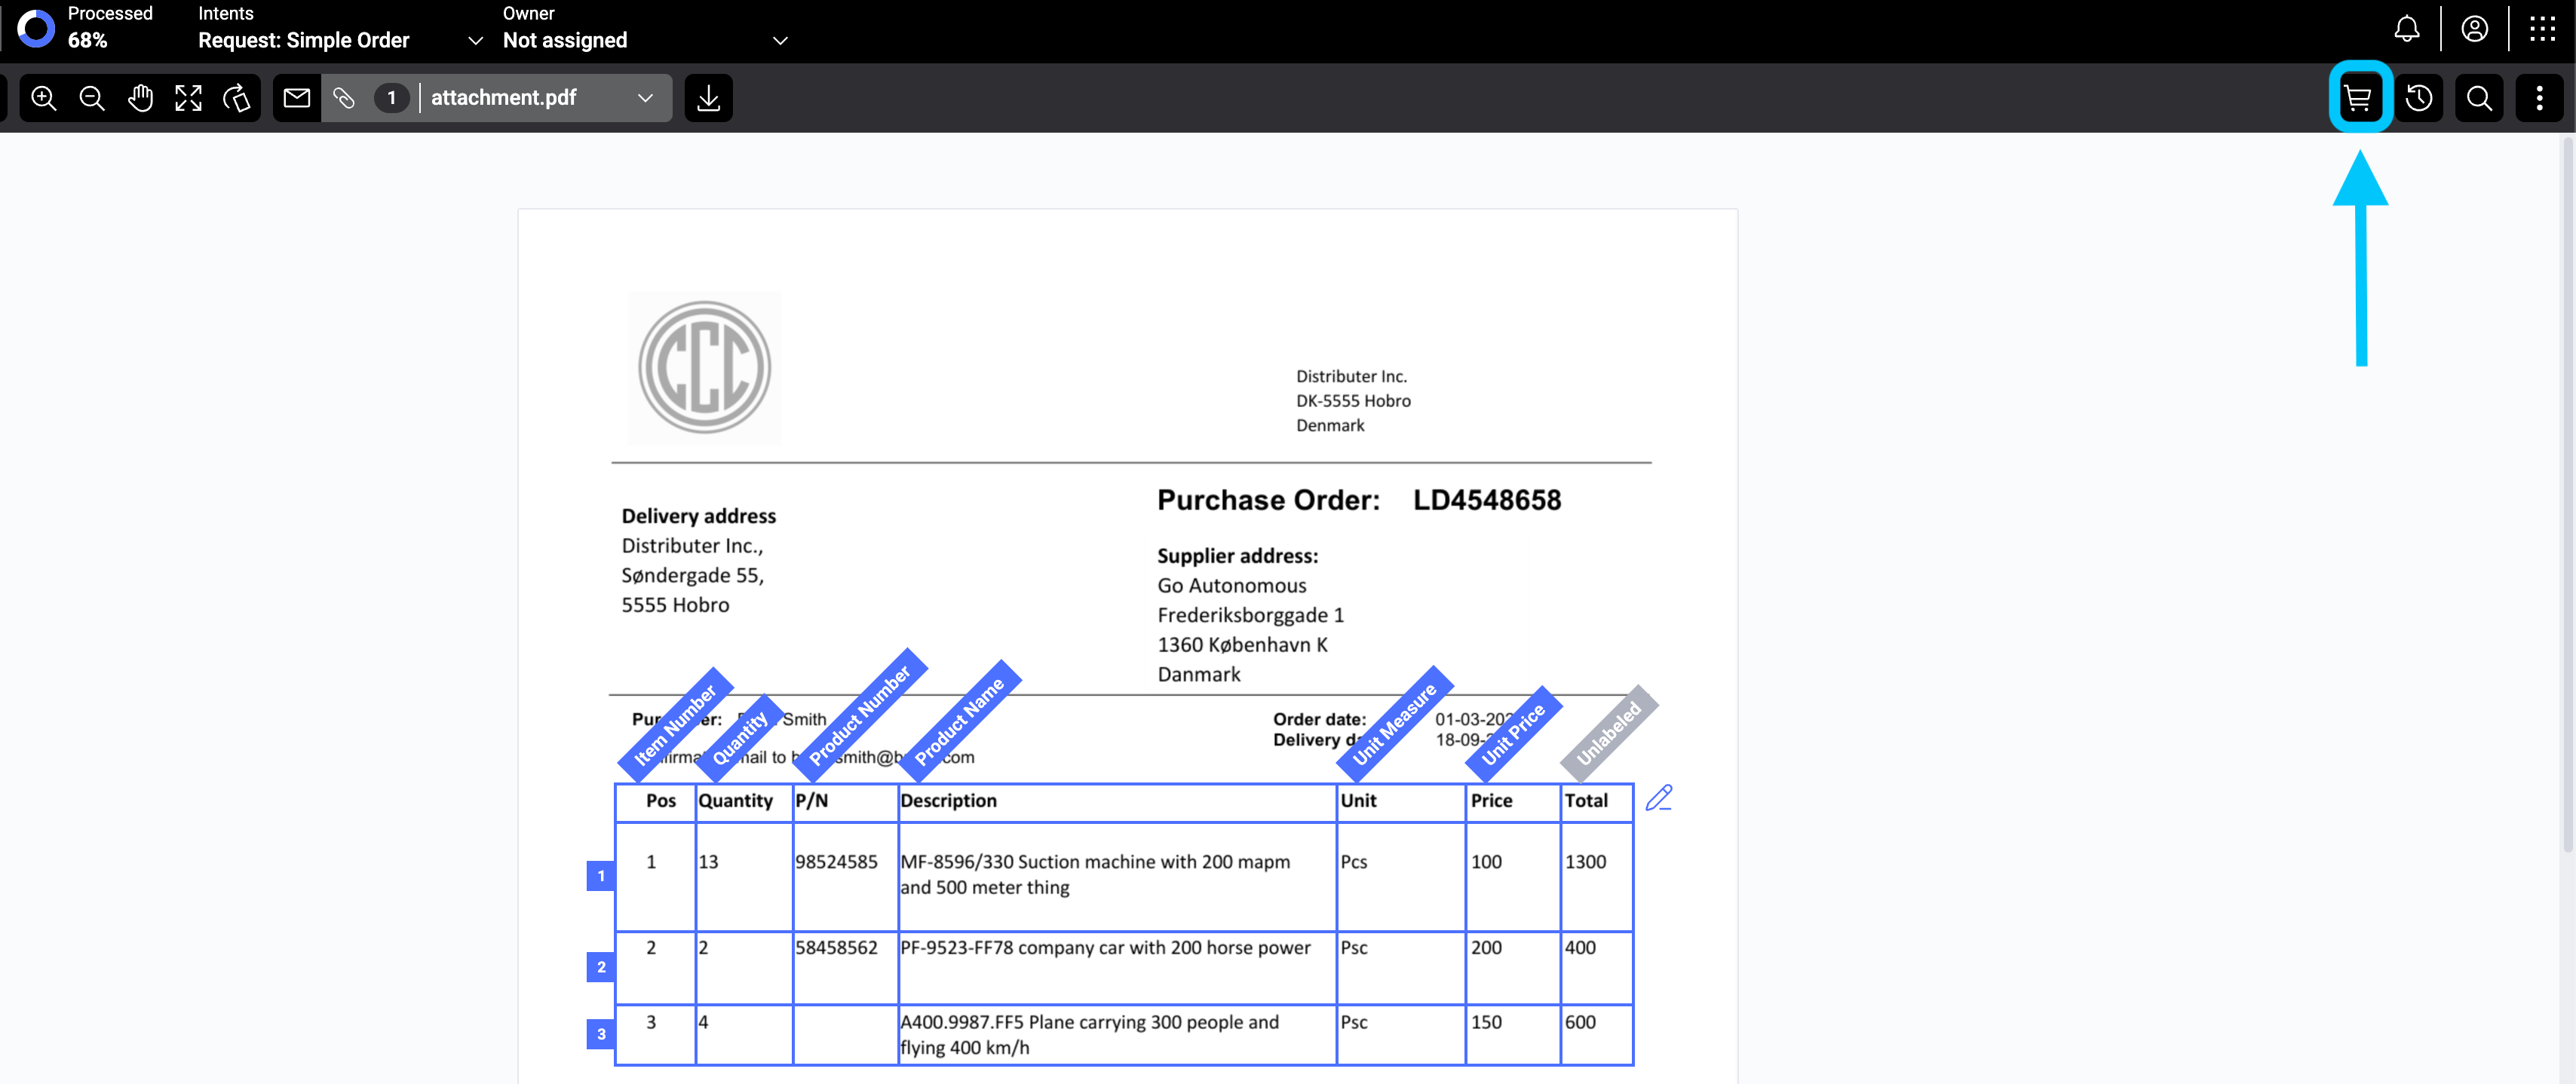
How to access the Product Cart
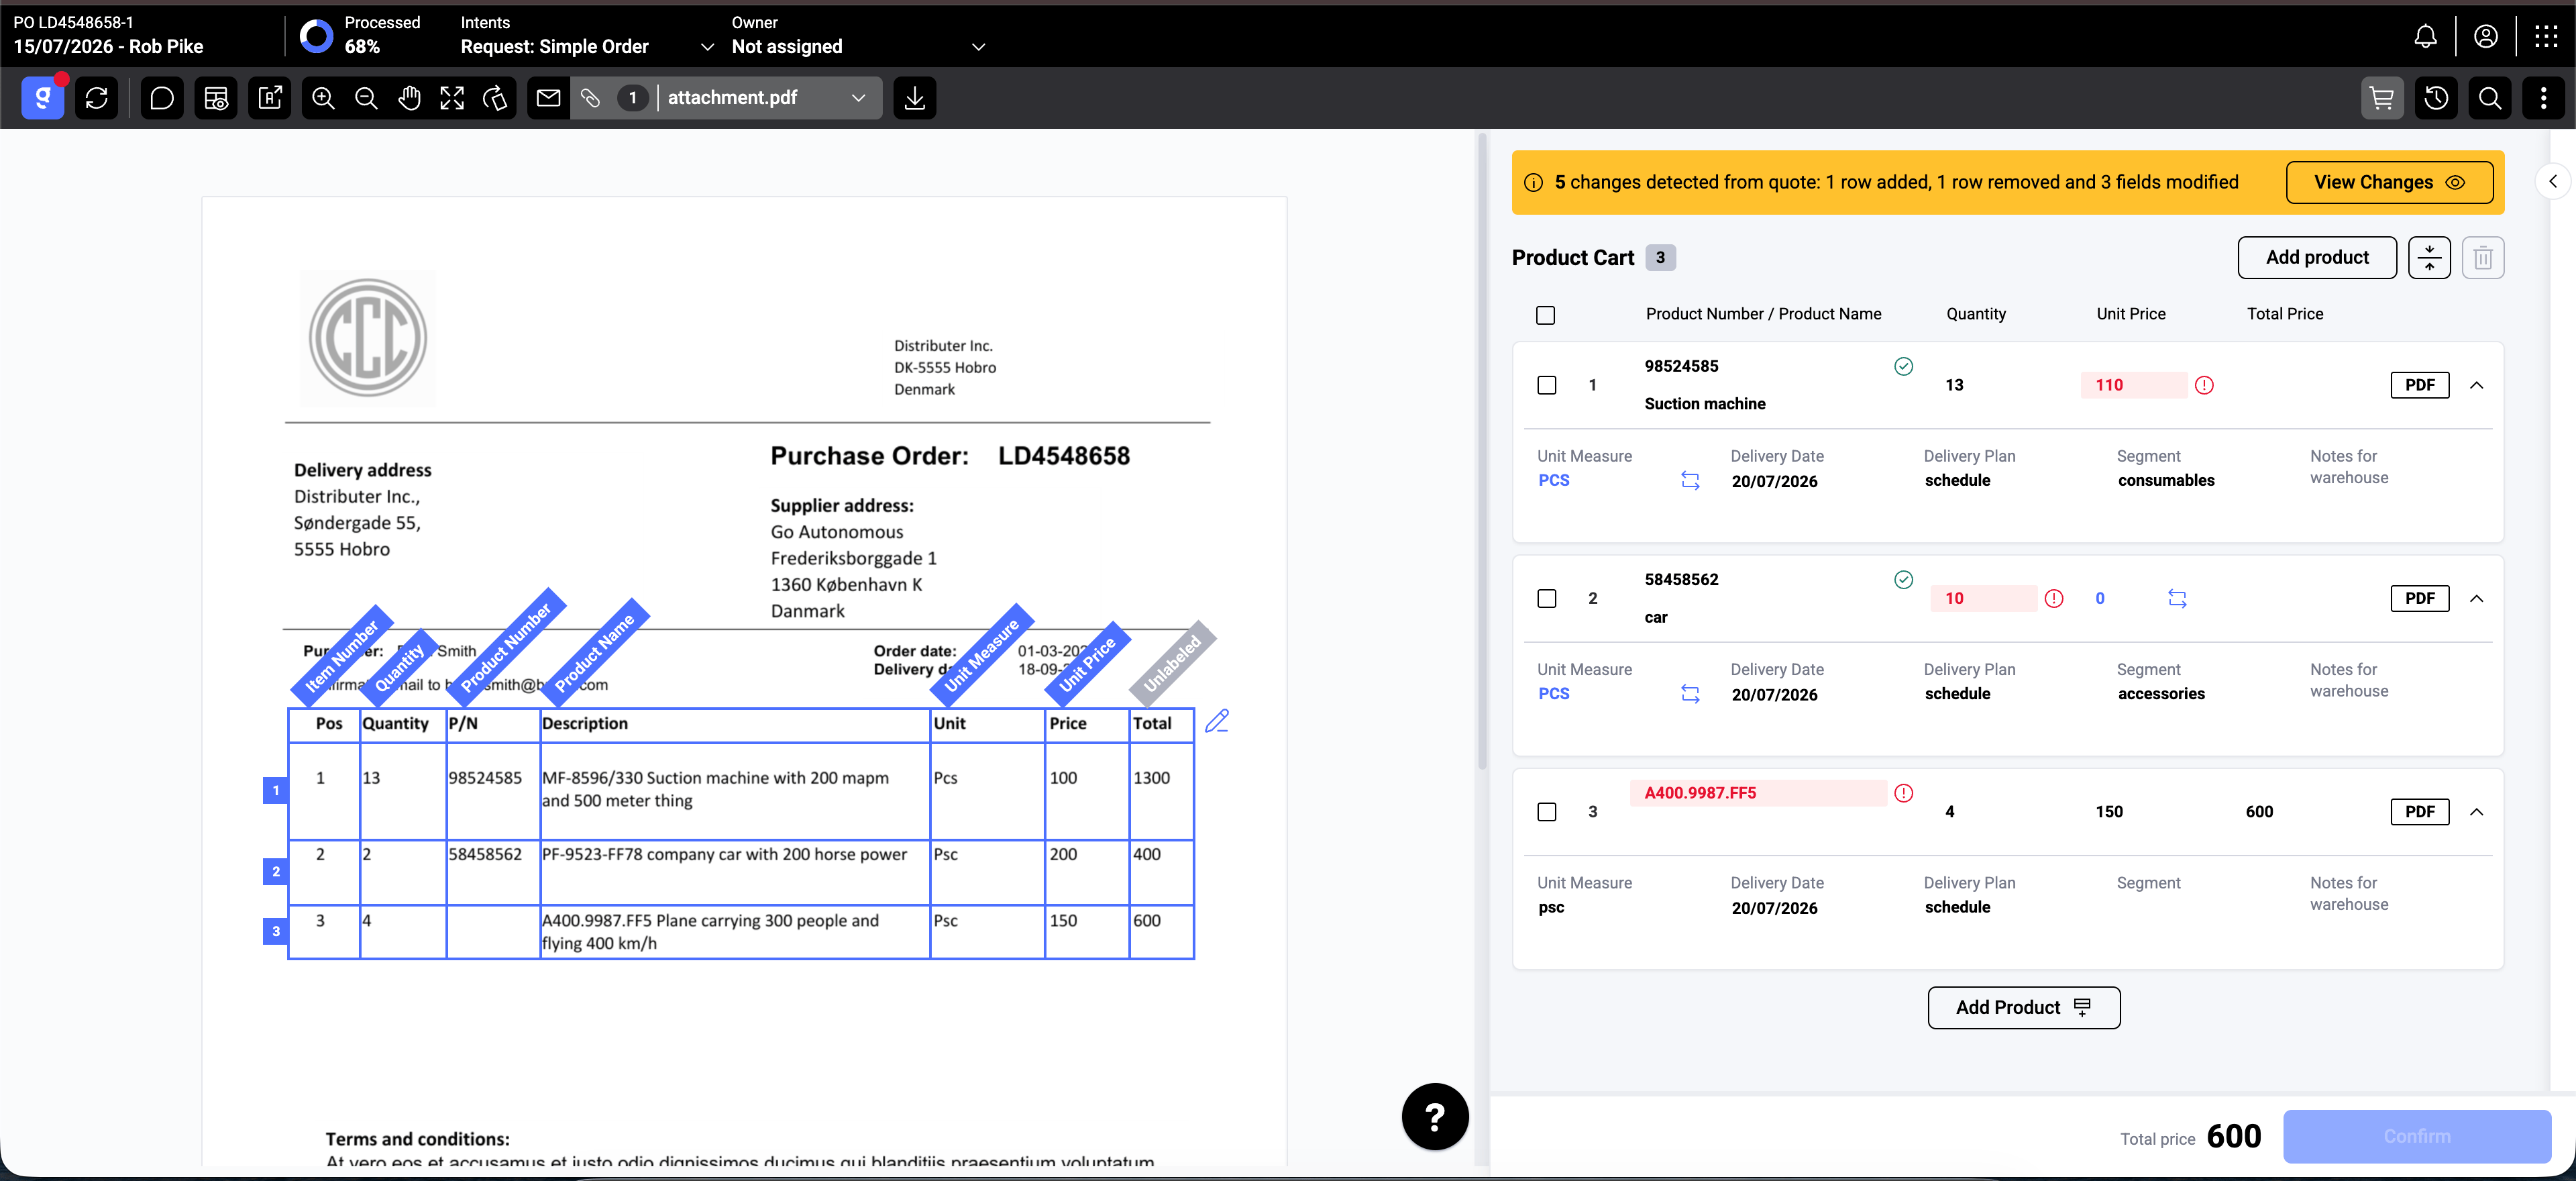
View of the Product Cart
Product cart columns
Each line in the cart can include the following fields (depending on your field configuration):- Line number — the row position in the cart.
- Product Number — the part or SKU identifier.
- Product Name — the human-readable product description.
- Quantity — the number of units requested.
- Unit Price — the price per unit.
- Total Price — calculated automatically (quantity × unit price).
- Unit of Measure — the unit type (e.g., Piece, Set, Box).
- Category — the product category or classification.
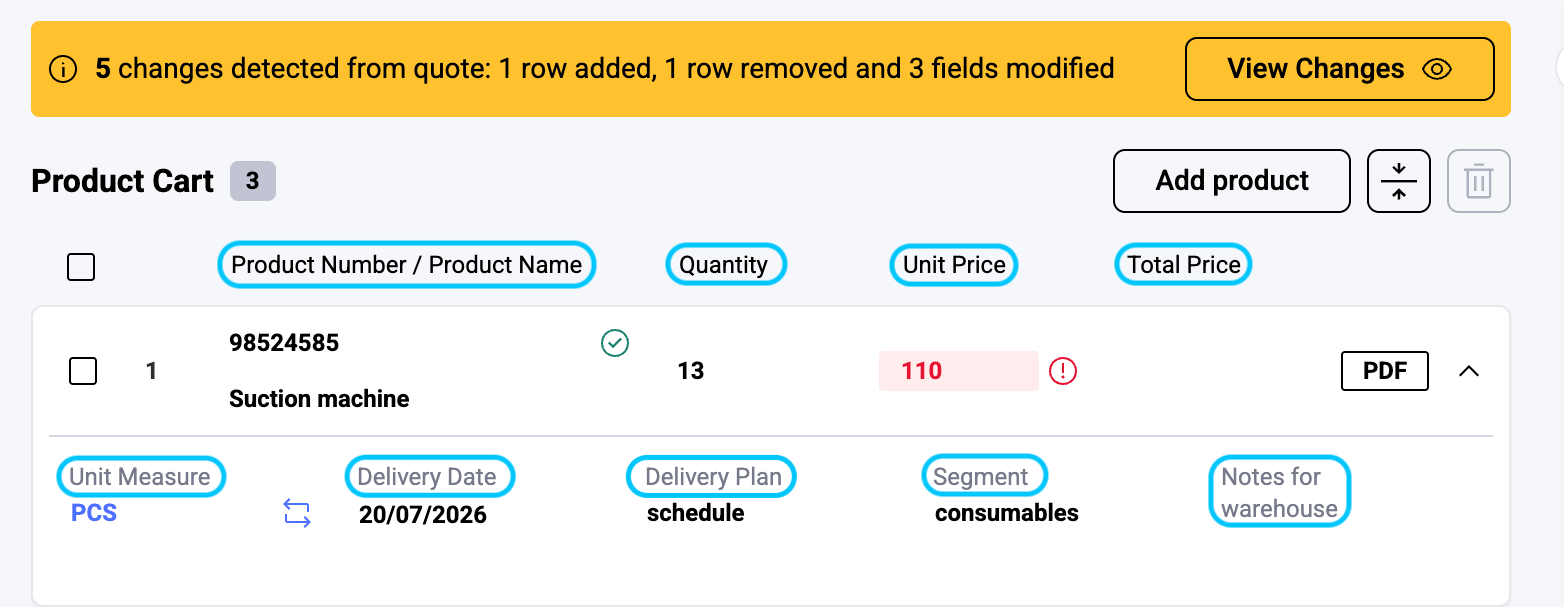
Fields in the product cart
The exact columns shown in the cart depend on your organization’s field configuration. Your admin can add, remove, or reorder fields.
Field spanning across columns
Some fields are configured to span more than one column in the cart. The product cart preview honours this spanning when it lays out the columns, so a long product description or a wide combined field can occupy the space it needs without breaking the row alignment. Field spanning is controlled per-field in your field configuration. Ask your admin to adjust thefield span on a column if a value is being truncated or if you want two narrow fields to share a slot.
Edit a product line
Click on any field value to edit it directly. For fields connected to your product catalog — like product number or product name — typing triggers a search. Select the correct match from the dropdown to auto-populate related fields.Add a product line
You have several options for adding lines:- Add product — click the Add product button below the cart to add a new empty row at the end.
- Add Product Above / Add Product Below — hover over an existing line to reveal these buttons, which insert a new row at a specific position.
Remove a product line
Select the checkbox next to the line(s) you want to remove, then use the delete action. Removed lines can be recovered using the History feature.Reorder product lines
Line numbers indicate the order of items. You can change positions by editing the line number field directly or using drag-and-drop where available.Assign a highlighted value to a line
When you highlight a value in the document and pick a field from the extraction menu, the menu footer lets you decide where the value goes. Its label switches based on the active tab:- Add to — for existing product cart fields. Apply the value to a specific line, to All lines, or to All empty lines. Lines that are already confirmed are shown greyed out with the tooltip “This line is confirmed and cannot be edited.”
- Create as — for new line fields. Create a new line, or push the value into a specific existing line.